The Brompton bicycle isn’t a new invention. The first designs were made in 1975, and it went into production in 1981 in a format that is easily recognisable today. The design has had iterative changes over the years to make improvements. There are lots on the street in London, where it’s built; perhaps due its useful and easy small-fold which makes it ideal for small apartments and gives it its multi-modal capabilities.
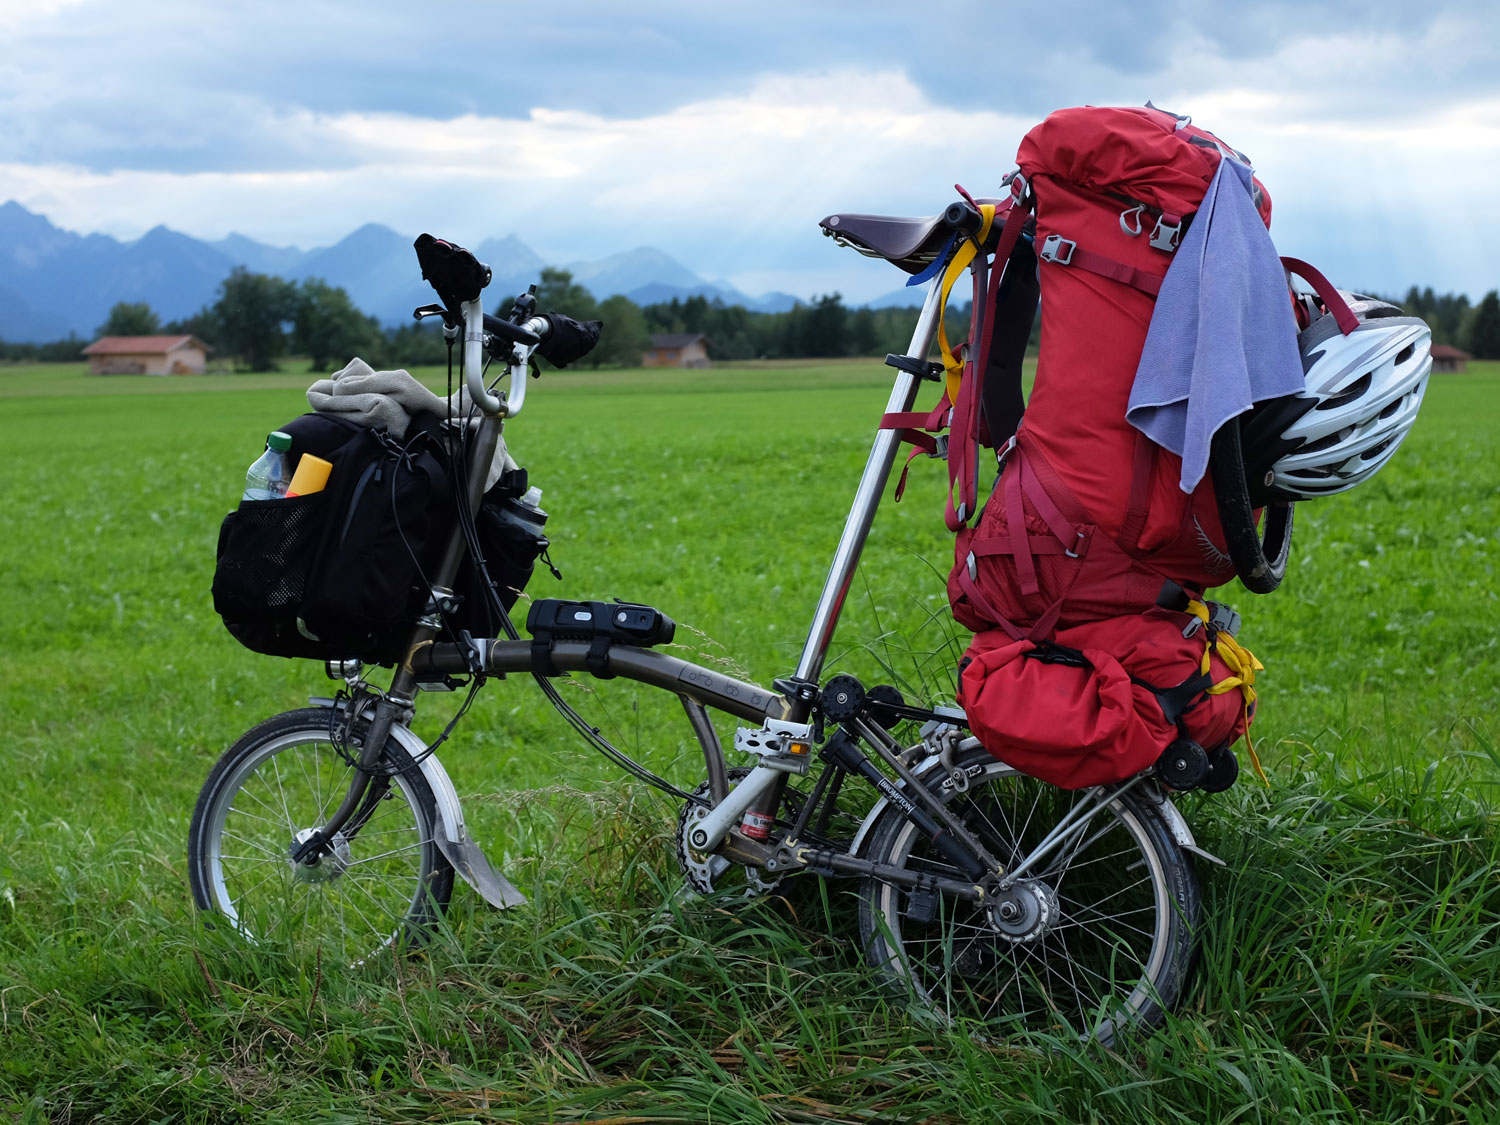
I purchased my Brompton M6L about 3 years ago. M=M shaped handlebars, 6=6 gears, L=mudguards but no rack.
In preparation for the tour I had it serviced by Brompton Junction in London (Brompton specialist mechanics), and fitted the rear rack.
Drivechain
For touring I switched to a small 44-tooth chain ring which shifts the gear ratio such that it makes it easier to climb hills. The downside to the smaller chainring is that you spin-out on big downhills, where your feet can’t keep up, but as this wasn’t a race I am more than happy to coast at these speeds!
Pedals
I used the Brompton stock pedals. I wanted the convenience of wearing sandals, and wasn’t trying to beat any speed records. Plus the left hand-folding pedal makes the folded bike nice and small.
Lights
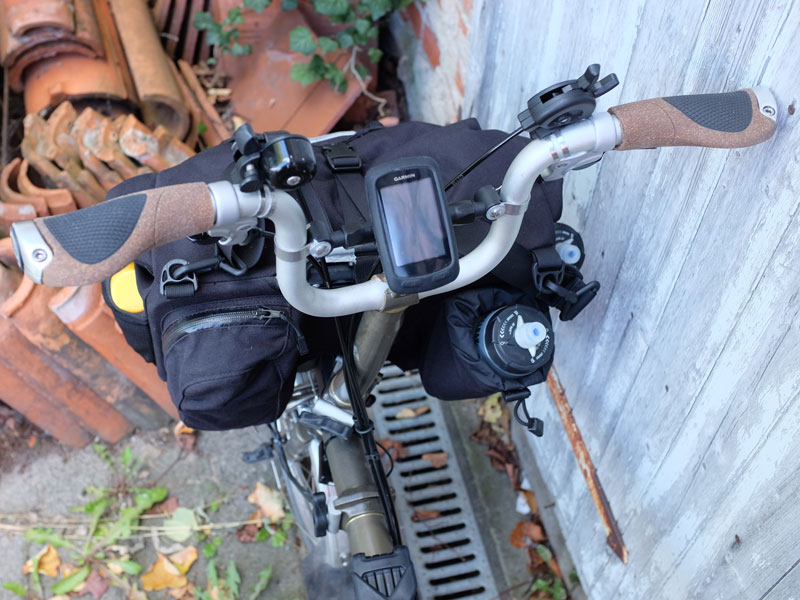
I’ve fitted a SON dynamo to the front wheel, which powers an Edelux II light on the front and Toplight Line Plus on the rear. I also used the dynamo to help keep my devices charged. The lights are both really bright. I left them set to ‘S’, which means they come on automatically when it gets dark, you go through a tunnel, dark forest etc. I had no issues with the dynamo or lights and they’ve been a nice worry-free addition.
Saddle
The seat is a Brooks leather seat which has been on the bike since new. I didn’t use ‘proofide’ leather treatment, but the saddle has been comfy from day one, and is still in excellent condition. Whilst touring you do sometimes get uncomfortable (light bruising of the seat bones?) sitting down all day, but I vary my seated position from time to time and don’t have any big issues.
I have the telescopic seatpost on my Brompton because I have long legs. I’ve retrofitted in with a Lightskin lighting system, which is excellent but no use during this tour as it can’t be seen with the luggage behind it. I used a Sharpie permanent marker to draw a line on the seat post so I know how high to raise it.
Cockpit
I use Ergon GP-1 Biokork grips. These require cutting down slightly (easy to do with a Stanley knife) to fit onto the M-type handlebars. The handgrips provide support which helps stop me getting pins and needles in my ring and little fingers (relating to the ulnar nerve). I really like these grips, and deliberately fit them slightly loose so I can change the position a bit during long-rides to give variety. I have tried the GP3 grips before, but didn’t like the way the end bars reduced the grip area available for my big clumsy hands. The cork complements the saddle and raw lacquer bike finish also I find.
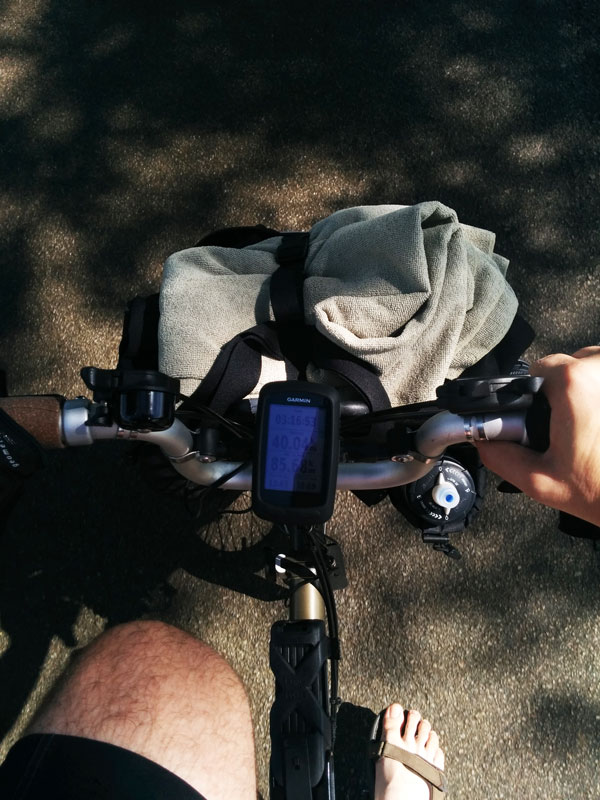
The handlebars have a Brompton-made brace fitted, which just gives a bit of extra rigidity (nice when you are hill climbing), and this also provides a higher mounting spot for the Garmin.
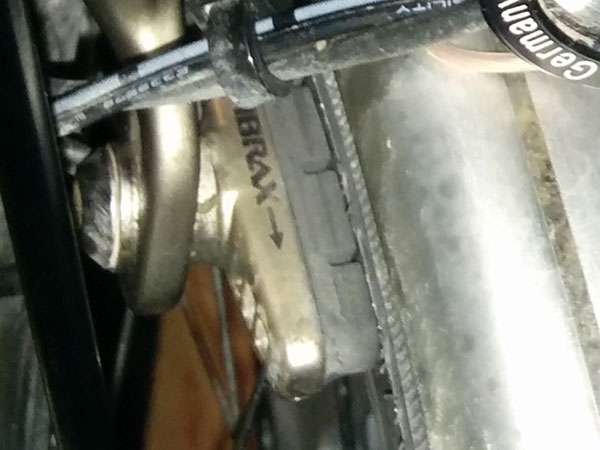
Brakes
I’ve fitted the more modern Brompton brake levers and use SwissStop brake pads. I was happy with the stopping power of the Brompton pads, but I’ve found the SwissStops cause less mess on the rim in wet weather and remarkably after this tour with all the heavy braking of a loaded bike, there is still loads of brake pad left. With the brakes well-adjusted I’ve never had any issues with stopping power on a Brompton at all.
Tyres
I fitted Schwalbe Marathon Plus tyres, and just had one puncture in over 4,000 km. There’s still loads of tread left on the tyres. I also use Schwalbe AV4 innertubes which I find a good size for the Brompton tyres. These come with Schrader valves. I pump up both tyres to 100psi. I did this roughly once per week, though the last thousand km I did just on the pressure I got it up to using the Brompton’s supplied Zefal pump, which I quite like.
Security
I used the Abus Bordo Grani X-Plus lock. I don’t take a lock with me in London as sadly there are lots of scummy thieves about – I take the bike with me everywhere (another benefit of the Brompton). However a solo bike tour is different – there are times when you have to leave your bike unattended. This lock weighs 1.6kg – a deterrent in itself! Sadly IMHO there doesn’t yet exist an effective lightweight lock. It does fold down into quite a neat package though which is easily mounted on the Brompton. I locked the bike up when I went into supermarkets, and locked it to anything suitable I could find at a campsite, such as a tree with 4 inch trunk. I then covered the bike with a big ugly grey bin bag which made it less conspicuous and also kept it dry if it rained.
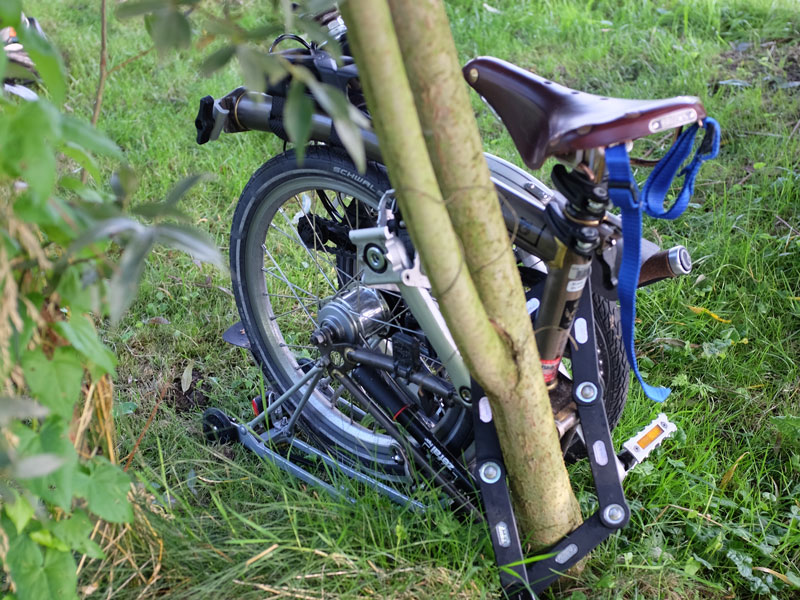
There was only one occasion I camped and couldn’t lock it to anything and on that occasion I kept it in the tent porch area.
I also took a suitcase security cable with combination lock which I used several times in supermarkets to keep the rucksack attached to the rear frame.
Motor
Someone on the tour asked me if the bike has a motor. I am the motor!
Luggage
Front
On the front of the bike is the Brompton touring bag. I bought it with the bike and hardly ever go anywhere without it. It mounts to the Brompton luggage block on the frame (so is very stable and does not move with the steering), holds a lot, has 5 convenient pockets on the outside to help organise stuff, and comes with an effective bright waterproof cover which can be added when it starts to rain heavily.
Rear
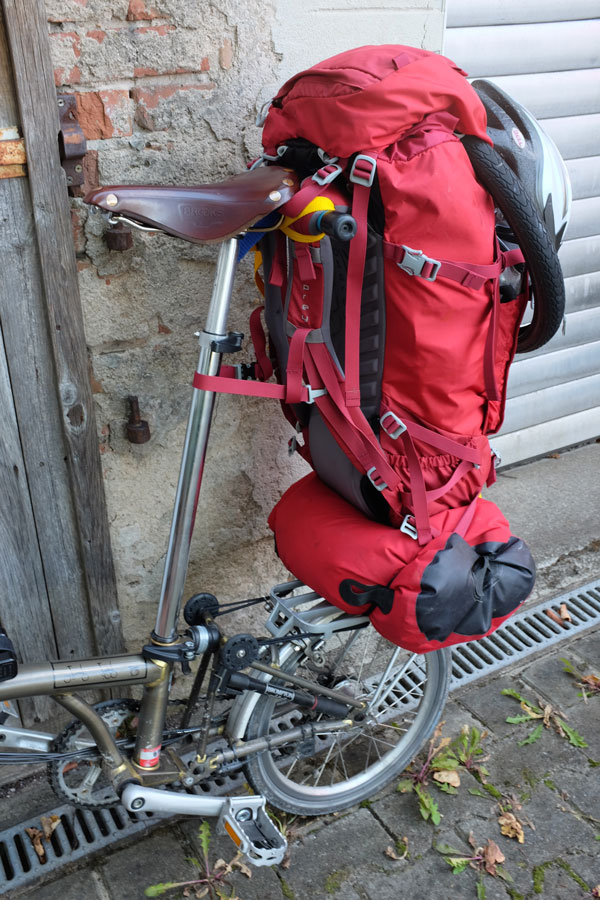
On the back of the bike I tried a few different things, but in the end chose a combination of rucksack and alpkit dry sack. The rucksack method has been well-documented by Path Less Pedalled. My system differed a little. Because I have a high saddle, I needed to add the dry sack below the rucksack to ensure the weight was mainly on the rack (and not the saddle).
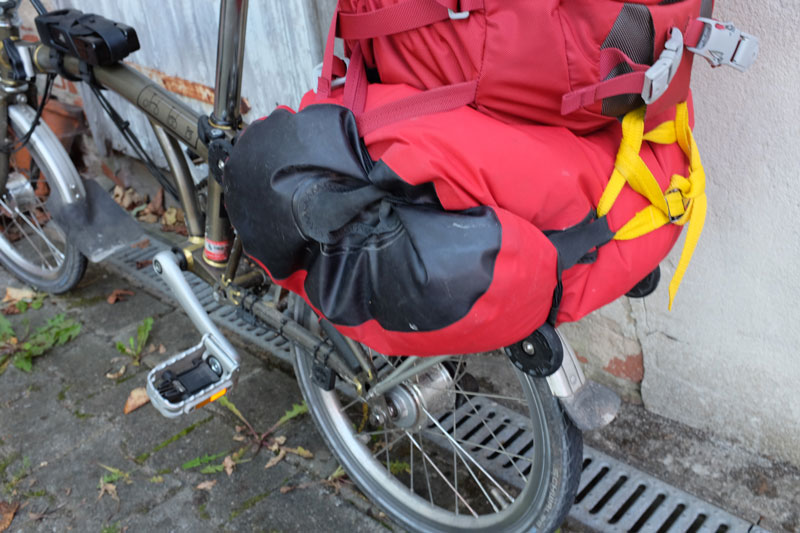
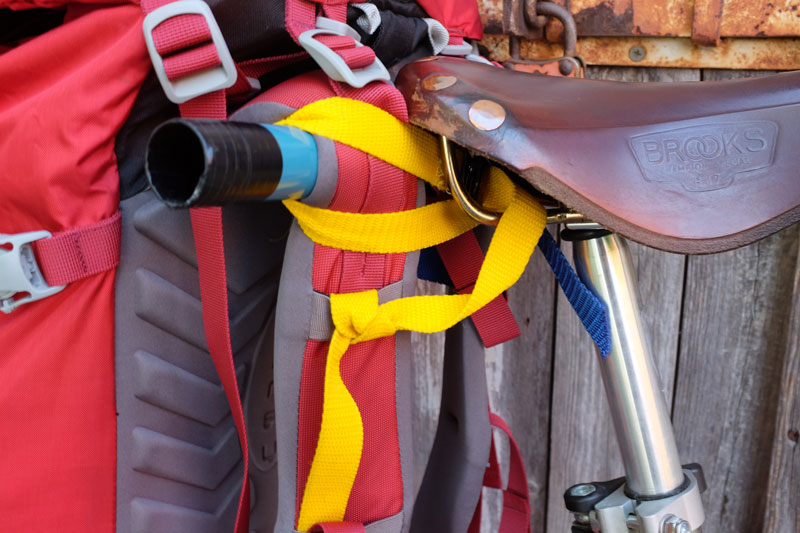
I cut a section of metal tube to mount from the saddle mounts using straps. To make things more secure I added a quick-release strap around the top-bar, and also one at the back to hold the rucksack firmly to the dry sack. Putting the rear luggage on took about 3 to 5 minutes, and about a minute to take off.
Total weight of bike and luggage was around 35kg, with front luggage being around 8.5kg. But of course this varied depending on what I carried.
Back to European Cycle Tour main page.
Very interesting and informative, this makes me want to go and get a Brompton, is the rack very expensive?
Thanks William. You can get the rack as an optional extra when you buy the bike (the last letter in the model number will be R to signify rack, e.g. ‘M6R’ will have a rack), or alternatively, it is relatively straightforward to add it any time subsequently. I use https://brilliantbikes.co.uk/35-brompton-spares as my go-to for Brompton parts. There are also a few non-Brompton manufactured racks available for Brompton bikes, but I’ve never used one so can’t vouch for them.
One thing to know is that the front luggage system on the Brompton is really good. A clip is mounted to the frame at the front of the bike. It is convenient and makes the bike very stable and is preferable to the rear rack imho. I fill up my front bag, then if I am touring etc I will then add luggage to the back.
I’ve been touring on my Brompton, which has a Kinetics rear end, featuring a Rohloff, 14 speed internal hub. Wearing a 59 tooth chainring (big, REALLY BIG) it climbs like a monster and offers this elderly rider (72) a chance to tour for fun (albeit not for profit – whatever THAT means).
Thanks Jim. Ben at Kinetics is a brilliant engineer, and I’m happy to hear your having fun – I’m not surprised! I’ve been using a 12 speed P-line for the past couple of years. I’ve switched out the largest rear sprocket to a slightly larger one, and it’s working really well. See you down the road 🙂